Hosting a TiddlyWiki Site on AWS - Part IV
Jul 8, 2022
6 mins read
In Parts I and II we created a fully functional TiddlyWiki website hosted on AWS. The only thing missing is the secure connection via https. Strictly speaking, it is not required for a Wiki website where all the content is publicly available. The secure connection does improve your site ranking with most popular search engines, though. As discussed below, there are additional costs in running a secure connection website. As a site owner you need to decide if the extra costs are justified.
AWS provides its users with Secure Sockets Layer/Transport Layer Security (SSL/TLS) certificates free of charge. The certificate is attached to a domain and can also include subdomains. The catch is that the S3 website hosting does not support the HTTPS protocol thus other services need to be deployed, most commonly CloudFront.
AWS CloudFront is a content delivery network providing low latency and high speed. Frankly, it is a massive overkill for a Wiki website unless you plan to have millions of visitors. On the other hand, the service is reasonably priced and there is no reason not to use it.
Prerequisites
In case you skipped Parts I and II, you need to following to proceed:
-
An active AWS account with administrative privileges
-
Domain name hosted by AWS Route53
For those who completed the previous parts I have to apologize. We have to tear down all our handcrafted infrastructure (except the domain name, of course) and start again. There are quite a few changes that we need to make, and it is much easier to start with a clean slate. So please back up the content of your website, empty the bucket and then delete it using the AWS console. If you have a Route53 DNS record pointing to the bucket, delete it as well. If you followed the instructions of Part III and created a user for working with the bucket, log in to IAM console and delete that user.
The Architecture
In addition to the resources we used in Part II we will require:
- SSL/TLS certificate for the subdomain;
- CloudFront distribution to serve the content from the S3 bucket.
All operations can be performed from the AWS console, but the process is tedious and error-prone. Luckily, it can be automated using another AWS service, CloudFormation. The required infrastructure is described in a template file, that is then used by CloudFormation to create and deploy all AWS resources. This combination of resources is called a stack.
Deployment with CloudFormation Template
You can start the stack creation by clicking the Launch button below.
LaunchIf you feel uncomfortable running the template from this blog you can download it first and inspect the code or check it on GitHub. It creates the following resources:
-
S3 bucket,
-
Route53 DNS record for a subdomain in your hosted domain zone,
-
SSL/TLS certificate for you subdomain,
-
CloudFront distribution,
-
User with programmatic access, and
-
Optionally, a URL rewrite function (not required for a TiddlyWiki site).
Creating the Stack
If you are satisfied with the template, click the Launch button above and login to your AWS account. The process of creating a CloudFormation stack consists of several steps:
-
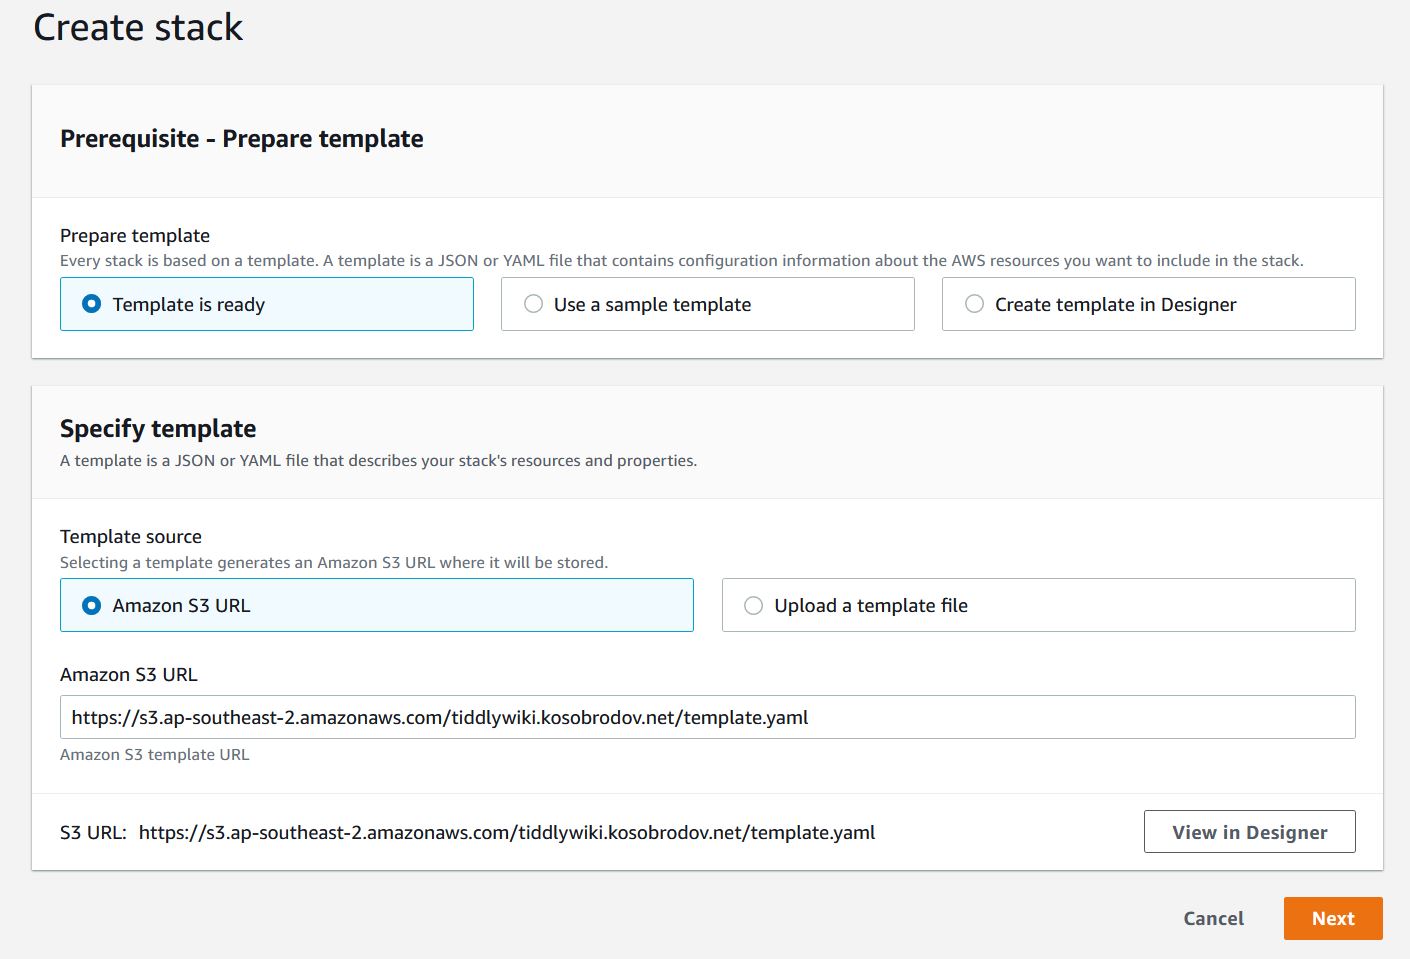
Specifying the template. This has been already done for you so click “Next”
-
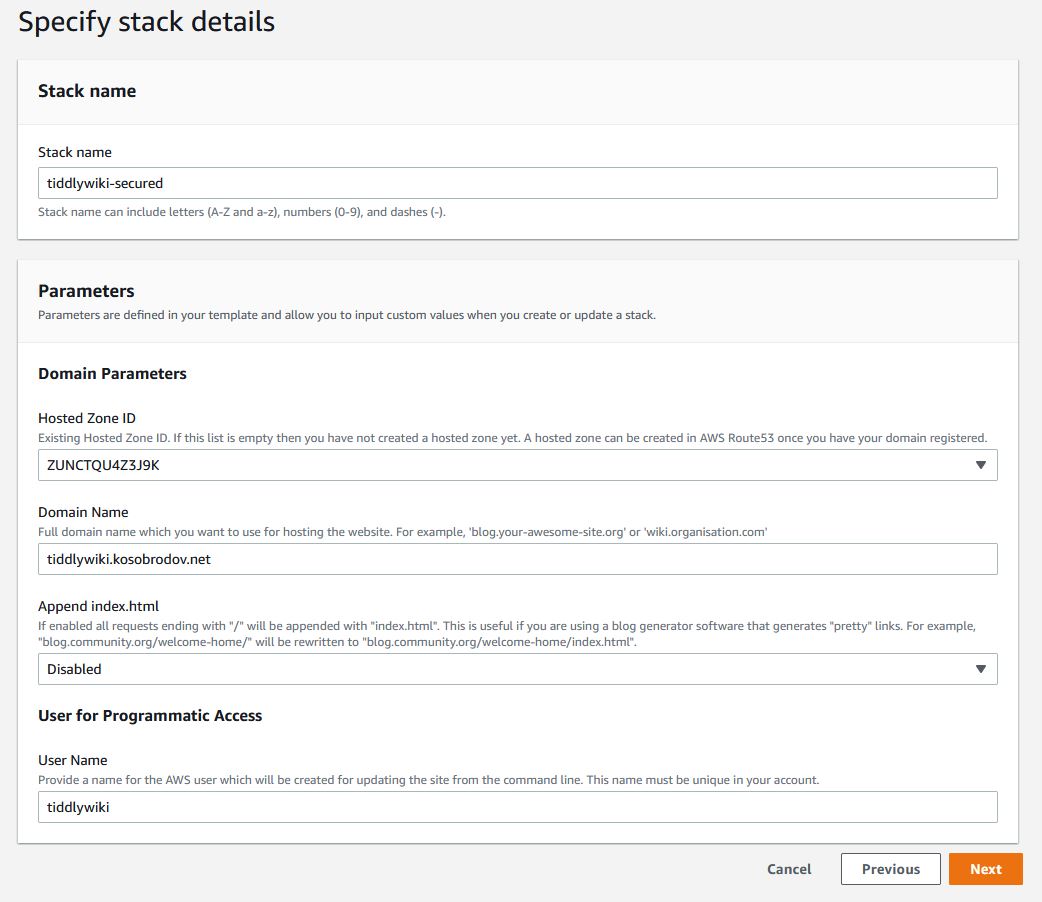
Defining template parameters. This is the most important step. You don’t need to change the default stack name, unless a stack with this name already exists in your account. Follow the instructions in the Parameters Section. If the list for the Hosted Zone IDs is empty, then something is wrong with your Route53 configuration. Check that you have a hosted zone and that it is enabled. Fix any possible issues, cancel the stack creation and start again. The “Append index.html” box should read “Disabled”. This feature is only required for hosting blogs. Change the default username to “tiddlywiki”, that way you don’t need to modify the scripts from Part III. Click “Next”.
-
Configuring stack options. No changes are required so click “Next”.
-
Reviewing and creating the stack. Check the parameters we entered. You can make changes by returning to previous pages. When ready, scroll to the bottom of the page and check the box against “I acknowledge that AWS CloudFormation might create IAM resources with custom names”.
The template creates a user with limited access rights, exactly as we did in Part III. CloudFormation requires confirmation for this operation as it can potentially have security implications. Click “Create stack”.
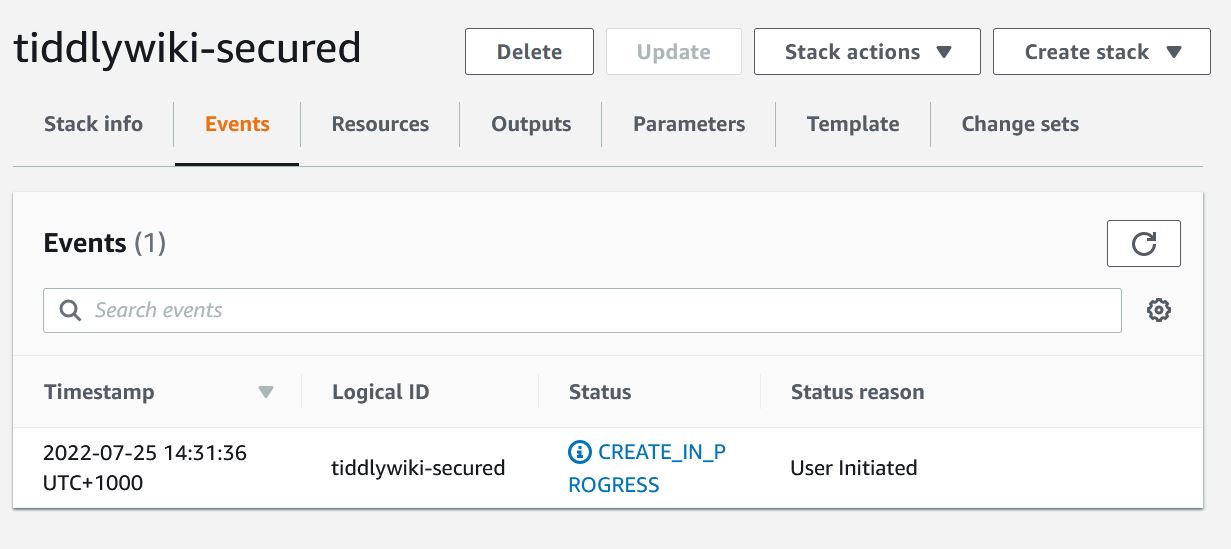
The process takes a few minutes. You can monitor the progress on the stacks page.
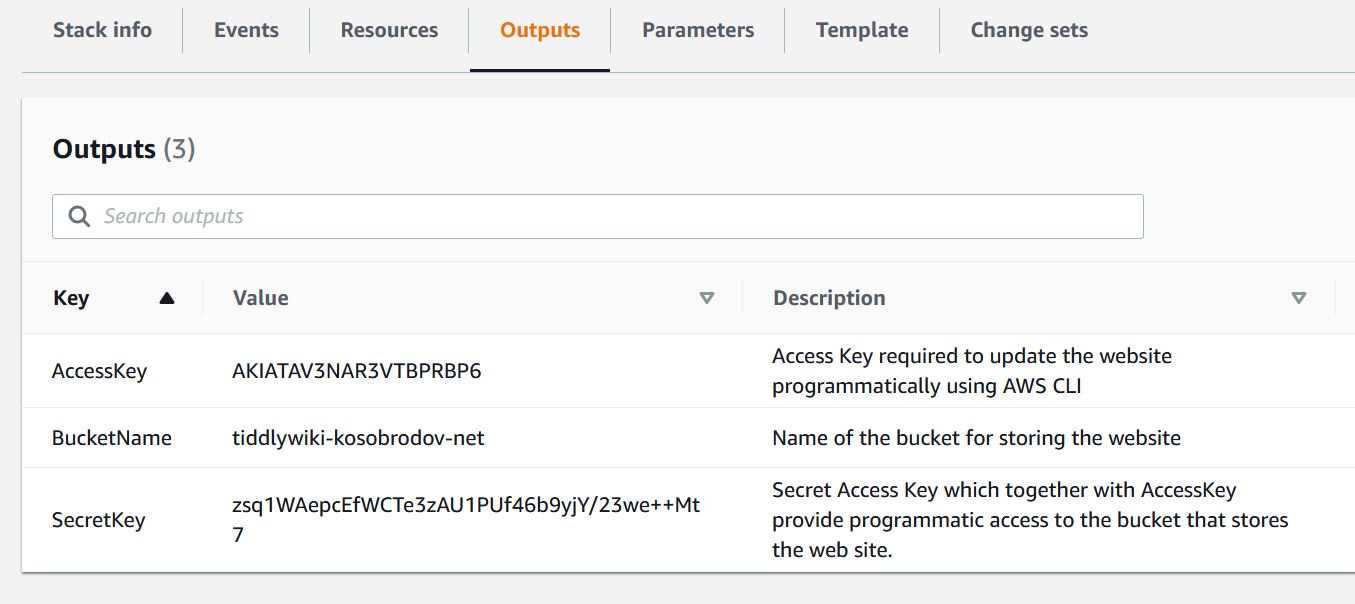
When the stack creation is complete, open the Outputs Tab. It should look like this:
Keep the page open.
Configuring AWS CLI
The last step is to configure AWS CLI so that it could access the bucket. Run the following command from your terminal (or Command Prompt if you are using Windows):
aws configure --profile tiddlywiki
This will configure AWS credentials for user tiddlywiki. The command will prompt for AWS Access Key ID and AWS Secret Access Key. Copy these parameters from the Outputs of the stack. The region and the output format are not important, use “us-east-1” and “json”, respectively.
Check that the credentials are working by listing the content of the site bucket:
aws s3 ls s3://<bucket-name> --profile tiddlywiki
The command above should produce empty output since we have not put anything in the bucket yet. If you see an error message repeat the configuration and make sure you copied the keys properly.
Now we are ready to upload content to our website. You can do this by executing aws s3 cp command from the terminal (Command Prompt) or creating the helper scripts as described in Part III
Deleting the Stack
When you no longer need the resources we created you can delete the stack by logging into your AWS CloudFormation console, selecting the stack and clicking the Delete button.
Wrapping Up
By using CloudFormation template we deployed production-quality infrastructure for hosting a TiddlyWiki site. This method is much easier than the manual “point-and-click” approach we used previously. I hope you find it useful. Good luck with your website!


