Hosting a TiddlyWiki Site on AWS - Part II
Jul 8, 2022
5 mins read
In the previous post we created a TiddlyWiki site hosted on AWS S3. We have a fully functional website, but there are several things we would like to improve. First, the address of the site is long and hard to remember. Then, updating content by uploading a new version of your website using AWS web console is somewhat tedious. Finally, our website is not secure since it does not support the https protocol.
In this part we are going to add a custom domain name for our website. In the following post I’ll describe some tools that greatly simplify uploading content to the website. A full solution including a certificate for secure connection will be discussed in Part III.
Custom Domain Name
There are several options for providing a custom domain name for your site:
-
Link-shortening services;
-
Redirect from other websites; and
-
AWS Route53.
Technically, you can configure a custom Domain Name Server to route traffic to the S3 bucket, but we are not considering this option here.
Link-Shortening Services
There are several link-shortening services like Bitly, Rebrandly, TinyUrl, and Zapier that will turn the S3 bucket URL into something short and memorable. For example, I used TinyUrl to convert http://tiddlywiki.kosobrodov.net.s3-website-ap-southeast-2.amazonaws.com/ to https://tinyurl.com/tiddlywiki-hosting. A lot of these services have free plans that might satisfy your needs. Be warned that you if you choose to change the target URL you will need to create a (paid) account.
Redirect from Other Websites
If you have an existing website or a blog you can create a redirect page that will point to your S3 bucket. I use Hugo to generate this blog and I followed the instructions on ScriptEverything.com to create a redirect page for my S3 website.
Github can host a static website using GitHub Pages. It can also be configured as described in this post to redirect to your site.
You would need to figure out how redirection works with your content management system. Generally, a redirect page is created with the following HTML code:
<!DOCTYPE html>
<meta charset="utf-8" />
<title>Redirecting to https://example.com/</title>
<meta http-equiv="refresh" content="0; URL=https://example.com/" />
<link rel="canonical" href="https://example.com/" />
Link-shortening services and redirection use this technique. You open a shortened or existing URL, the browser loads the redirect page from this site and navigates to the website hosted from AWS S3. While simple to implement, this mechanism has obvious drawbacks. Loading an additional page increases latency and affects user experience. Also, redirection is not favoured by the search engines. Other than that, both methods are totally valid, and you could use any or both of them if they serve your needs.
Creating a Hosted Zone in AWS Route53
Having your domain registered with AWS Route53 is probably the best way of adding a custom domain name to a S3-hosted static website. I also find it cost-effective comparing to other domain registrars, especially after you consider privacy protection that is included in Route53 pricing but normally incurs an extra cost with other providers.
The instructions for registering a new domain name are here. The list of top-level domains is quite impressive and is growing.
You can also consider transferring an existing domain name from a different provider to AWS. The process takes some time.
Assuming you have your domain in a Route53 Hosted Zone, let’s configure the Domain Name Service to route traffic to our site. To achieve this:
-
Open Hosted Zones in AWS Route53 Console (requires logging in).
-
Click on your domain name. On the Records tab click “Create Record”.
-
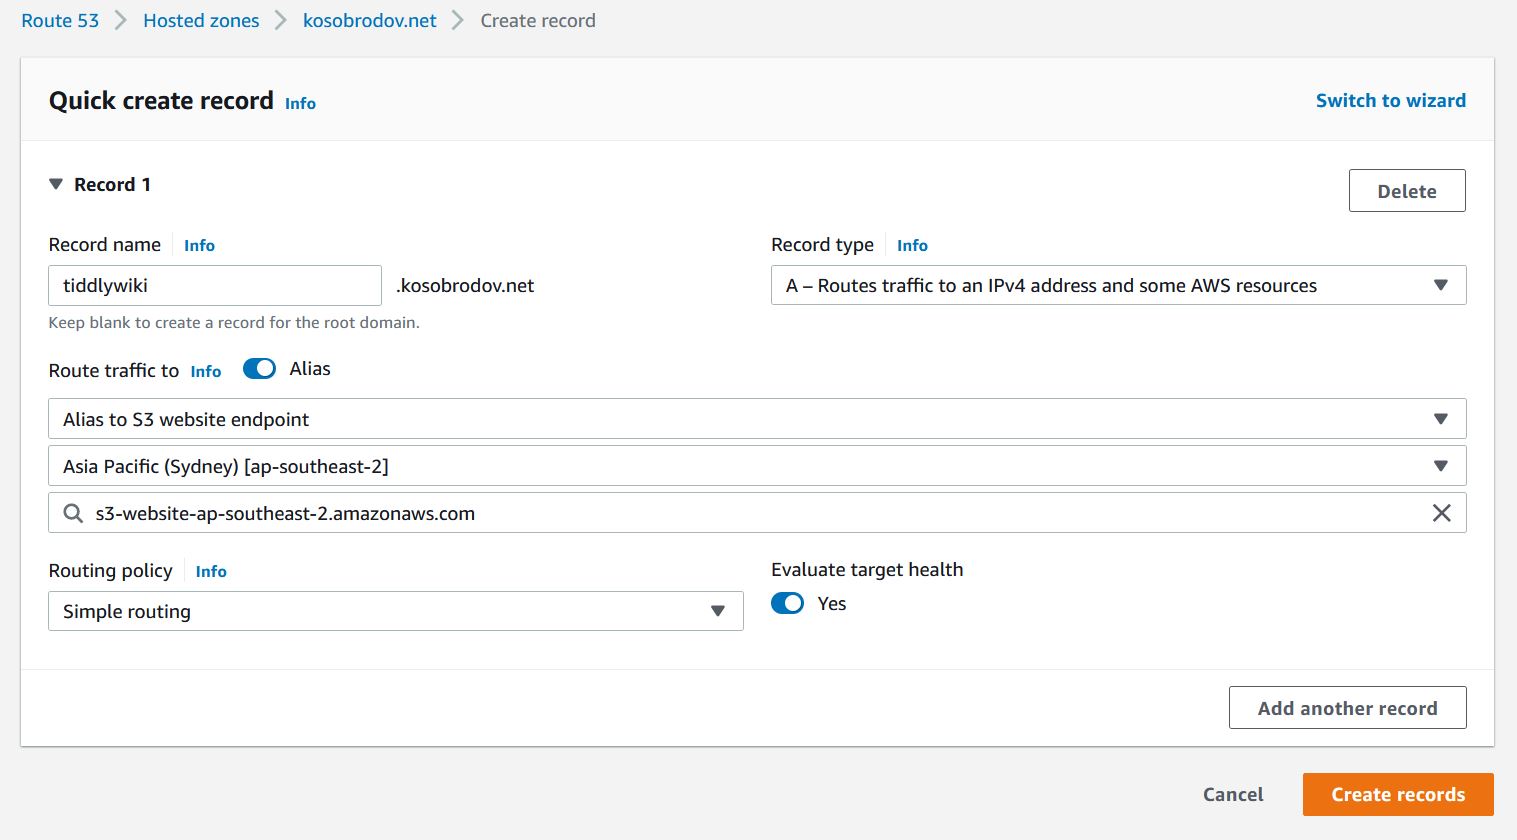
Type your subdomain name, in my example
tiddlywiki. You can also leave the box blank serve the website from your root domain. -
From the dropdown list choose record type
A. Select “Alias to S3 website endpoint” and then your region. The S3 bucket with your website should appear in the drop-down box below your region. Leave “Routing policy” at its default value (Simple) and “Evaluate target health” enabled. -
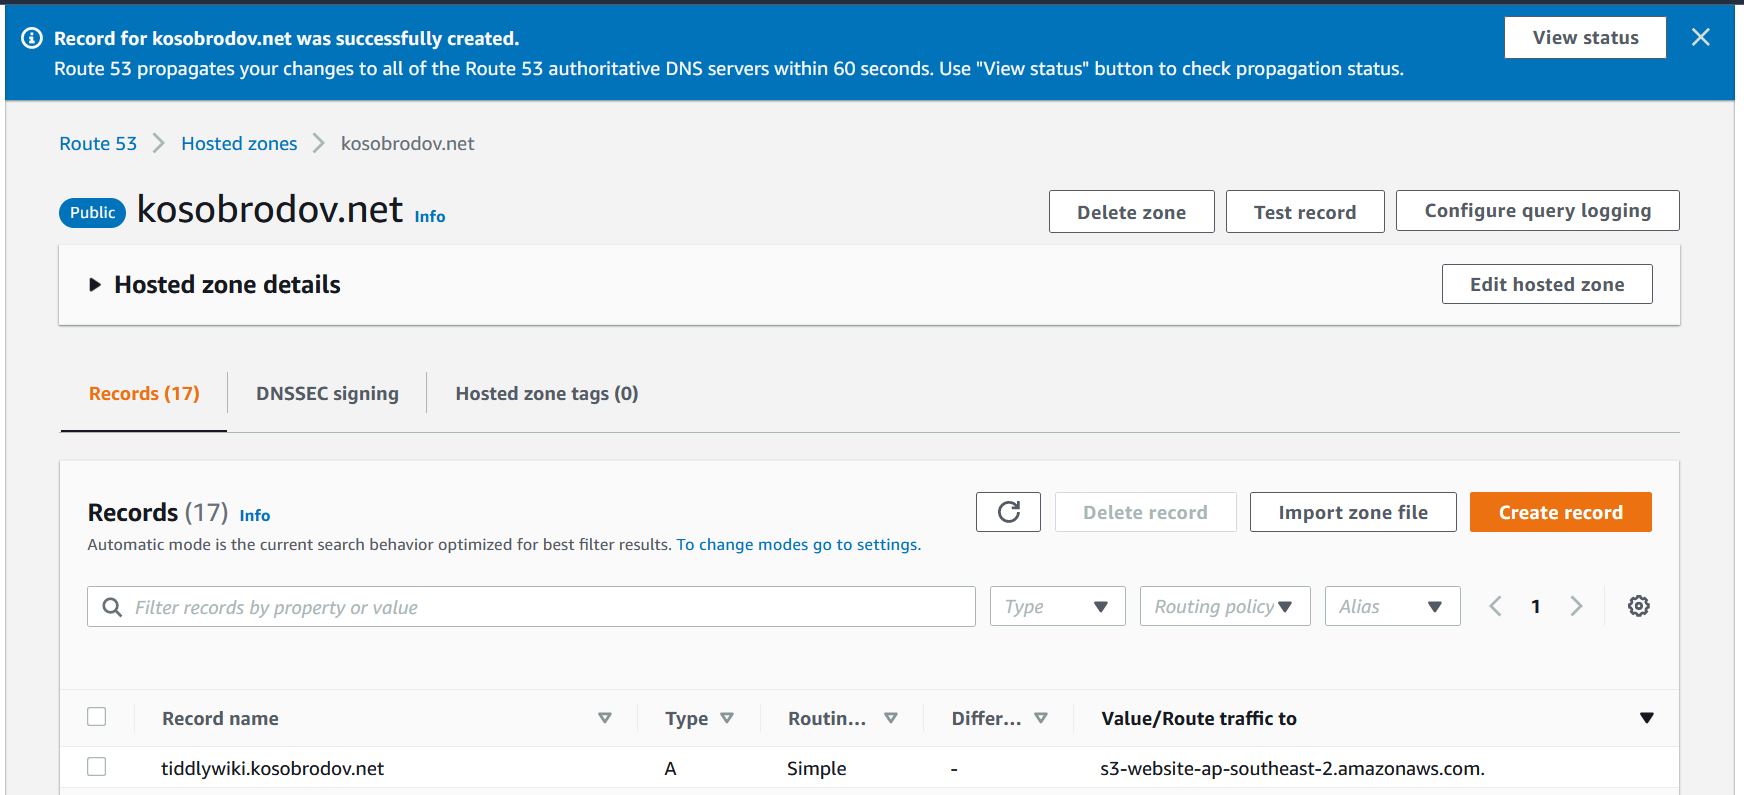
Click “Create record”. You should see a banner informing you that your record has been successfully created.
-
Wait for a few minutes, open the browser and type the subdomain URL in the address box. You should see your website. Keep in mind that the changes in the DNS records take some time to propagate. If you made a mistake and corrected it the old values could still remain in the system for a while.
What’s Next?
Our website is up and running and has a custom domain name. We can certainly stop here and focus on creating content, but I would recommend spending a bit more effort on configuring a few simple tools. In Part III we are going to install and configure AWS Command Line Interface and create two scripts for uploading and synchronizing the bucket.
One thing that we haven’t discussed yet is secure connection with the https protocol. Part IV describes how to obtain a certificate and configure AWS CloudFront distribution.
Conclusion
Custom domain name can be added by: (1) using a link-shortening service; (2) redirecting from other websites; and (3) registering your domain with AWS Route53 and configuring a DNS record. The latter method is simple and provides greater flexibility but increases your running costs.

